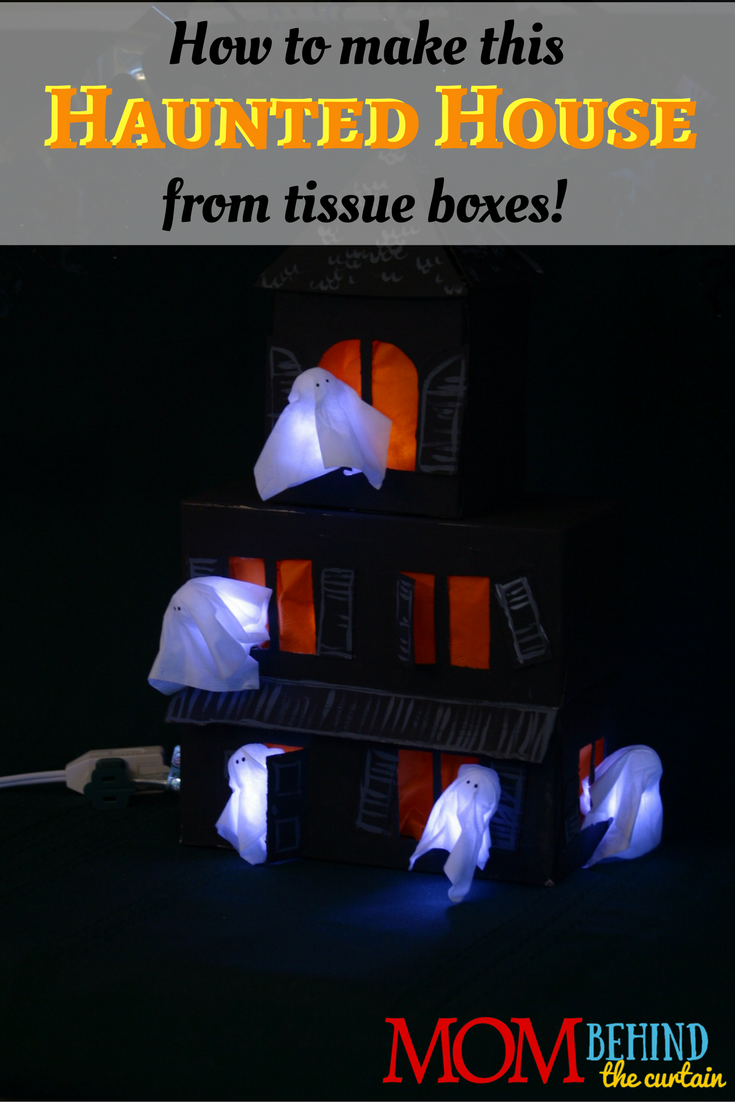
Here’s a Halloween craft your kids can help with that makes a great centerpiece decoration for your Halloween party. A Haunted House out of recycled boxes!
It’s fun when your kids can help you make your own Halloween decorations. This is an easy Halloween craft to make with your kids. It makes a great centerpiece for a Halloween party! I came up with this idea years ago and it was one of the crafts that I had published in Family Fun Magazine. At the time, it was owned by Disney, and it was fun to deposit checks from Disney in the bank. 🙂
I usually did up several crafts and then sent them photos of them. If they liked one, I’d write up the directions and mail them the sample I made, if requested. Since I was making lots of crafts and not blogging back in those days, I didn’t take photos of every step. Disney used to have the article on-line, but unfortunately they don’t anymore.

Tissue Box Haunted House with Tissue Ghosts Directions
You will need:
3 regular size rectangular tissue boxes
1 square tissue box
10 13”X13” orange paper napkins
2 white tissues
8 1” Styrofoam balls
4 white chenille stems
black acrylic paint
gray or white acrylic paint
glue stick
double stick tape
scotch tape
white glue
ball-point pin
Exacto knife or craft knife
(optional) string of white LED holiday lights
1. Turn the first rectangular tissue box upside down, so that the closed bottom is up. This will be the bottom floor. Use the ballpoint pin to draw double doors and windows. To cut double doors, use the Exacto knife to cut down the middle and across the top and bottom of the doors. Score the outside edge and bend back the doors. Cut double windows in a similar fashion, but leave a 2 mm bar between the windows. On some of the windows, cut part-way down the outside edge. (This will allow you to have some shutters that are crooked.) On one or two, cut off the window completely so that the windows will be shutter-less.
2. On the top of the second rectangular tissue box, cut from the edges of the tissue hole out to the edge of the box, to extend the edge of the hole the entire length of the box. Then cut back toward the closest edge of the box. This makes a flap that you can bend 180 degrees back to form the front porch covering. Turn the box upside down. Draw double windows on the second rectangular tissue box and cut the windows as before.
3. Turn the square box upside down, and draw windows on the side and cut them out with the exacto knife. I cut rounded windows in this top box.
4. From the last box, cut two bow tie shapes made from equilateral triangles (triangles where all the sides are the same length.) with 5 inch long sides. These will form the top roof of the house. Tape them to the square box using double sided tape on the inside.
5. Paint all three stories of the house with black acrylic paint. After it dries, paint on shutter, door, porch and roof details using gray paint.
6. To make the ghosts, cut each tissue into 4 squares. Coat the top and sides of a 1-inch Styrofoam ball with glue from a glue stick to attach the tissue squares. After the glue dries, paint on eyes with black acrylic paint. Cut the chenille stems in half and push one piece into the bottom of each Styrofoam ball of each ghost.
7. In the top center of the rectangle boxes, use an exacto knife to cut a hole big enough to push through the orange napkins and lights (if needed), about 3 inches in diameter.
8. Stuff one of the napkins in through the tissue hole of the square box and line the inside of the box. For the lighted version, gather a handful of the white lights into a bunch and wrap them in a second napkin and push them into the box. If you want lighted ghosts, push in a couple of extra lights. Pull the rest of the string down through the top hole and out of the second floor box. Use 2 napkins to line the second box, one on each side. Gather up two handfuls of lights, wrap each in another napkin, and push them up through the bottom hole of the box. Push in extra lights for ghosts. Line the bottom box in the same way. Glue all of the boxes together using white glue.
8. Tape the chenille stems of the ghosts into the insides of the windows so that the ghost peek out of the windows. Position over lights for the lighted version.
[Edit: The Family Fun Magazine site has been removed. Boo! But you can see a picture of the original magazine photo on my Pinterest board My Crafts in Family Fun Magazine.]

